Showing posts with label tree hugging. Show all posts

Saturday, May 29, 2010

Recycling and the Victory Garden

We want to do our part. As Americans in a recession, as a family watching our health, and as human beings trying to take care of our planet. So we've taken some steps. Not HUGE steps, but lots and lots of little ones.

You may think it takes a huge step to make a difference, you may think that making a change for your family's health and the Earth's well-being would be an inconvenience at best. But I'm here to tell you that you can make a difference, no matter how small your living space and how limited your funds. Because we've done just that. Here's a list of small changes we've made as a family to improve not only our own health, but the health of our planet.

  • Reduce. Pay attention to the products you're buying. Do you really need a multipack of individually packaged applesauce, or could you buy a large jar and portion it out at home into reusable containers? Also, can the package be recycled? I've stopped buying juice boxes in favor of Kool-Aid Cool Bursts because the juice boxes contain both plastics and cardboard that can't be separated and are impossible to recycle.

  • Reuse. Thrift stores aren't just about low prices. If more people purchased second-hand items, there would be less STUFF churning out of factories every day, using up resources and polluting our planet. One person's trash is another person's treasure...ever heard that saying? I pretty much live by it. :)

  • Buy only cleaning products that are phosphate FREE. You'd be surprised at how many aren't. Take the time to look.

  • Plant a garden. You don't need much space, and you'll have your own organic produce! Right outside your back door! The internet is also a plethora of information on organic gardening and container gardens for apartment-dwellers.


  • Our garden before planting was just a trashy weed-filled section in our back yard.

    After a few hours' work, we have 6 Roma tomatoes, 6 green peppers and 3 green beans. I also plan to have a container garden of peas in the next week or two.

  • Keep your small appliances unplugged and lights off when not in use. I'll bet your mom and dad told you this when you were growing up, and you know why? Because it saves energy! Not watching the TV? Turn it off. Not currently charging your cell phone? Unplug your charger. Easy peasy.

  • Use canvas bags every time you shop. I keep several of these in my van at all times. I use them at the thrift store, at the grocery, at Target, at yard sales. Everywhere, no matter how small the purchase. Or I don't use a bag at all.

  • Pick at least one day of the week to have a meatless dinner. This is not only cost effective, but helps limit the fats and nasty animal byproducts in your diet. Choose to make pasta and a salad, or a bean and vegetable soup. Lots of great vegetarian recipes can be found online!

  • Recycle everything. We're a 6-person family living in a 3-bedroom apartment. If we can find the time and space to recycle, then you can too! I use canvas shopping bags to "sort" my recycling. Cardboard goes in one. Paper, newspapers and magazines in another. Glass, plastic and tin cans in a third. When one is full, I take it out and put it in the back of my van. At the end of the week, when I go out to get groceries, I stop at the recycling bins across from the store and drop everything off.


  • So there you have it. Just a few small ways we're trying to make a difference. In what ways does your family make a difference? What changes do you plan to make in the future?

    Thursday, April 8, 2010

    Make Your Own Upcycled Pocket Journal!

    Here's a step-by-step photo tutorial on how to use thrifted and recyclable items to make a pocket-sized upcycled journal! Maggie and I made these for her school's Market Day, and they were a huge hit. Let's get started!

    Supply List:
    empty box for cover (postcard weight works best, cereal boxes are a little thick but still usable)
    Contact paper (at least a 5x7 inch scrap)
    scrap patterned paper for inside cover
    adhesive (not pictured)
    embroidery floss
    needle
    hammer & awl
    bone folder (not pictured)
    embossing tool with narrow end for scoring (the round end of a paint brush would work)
    hobby knife
    ruler
    scissors (not pictured)
    junk mail or other blank scrap paper (I got most of mine from old journals I found at Goodwill)

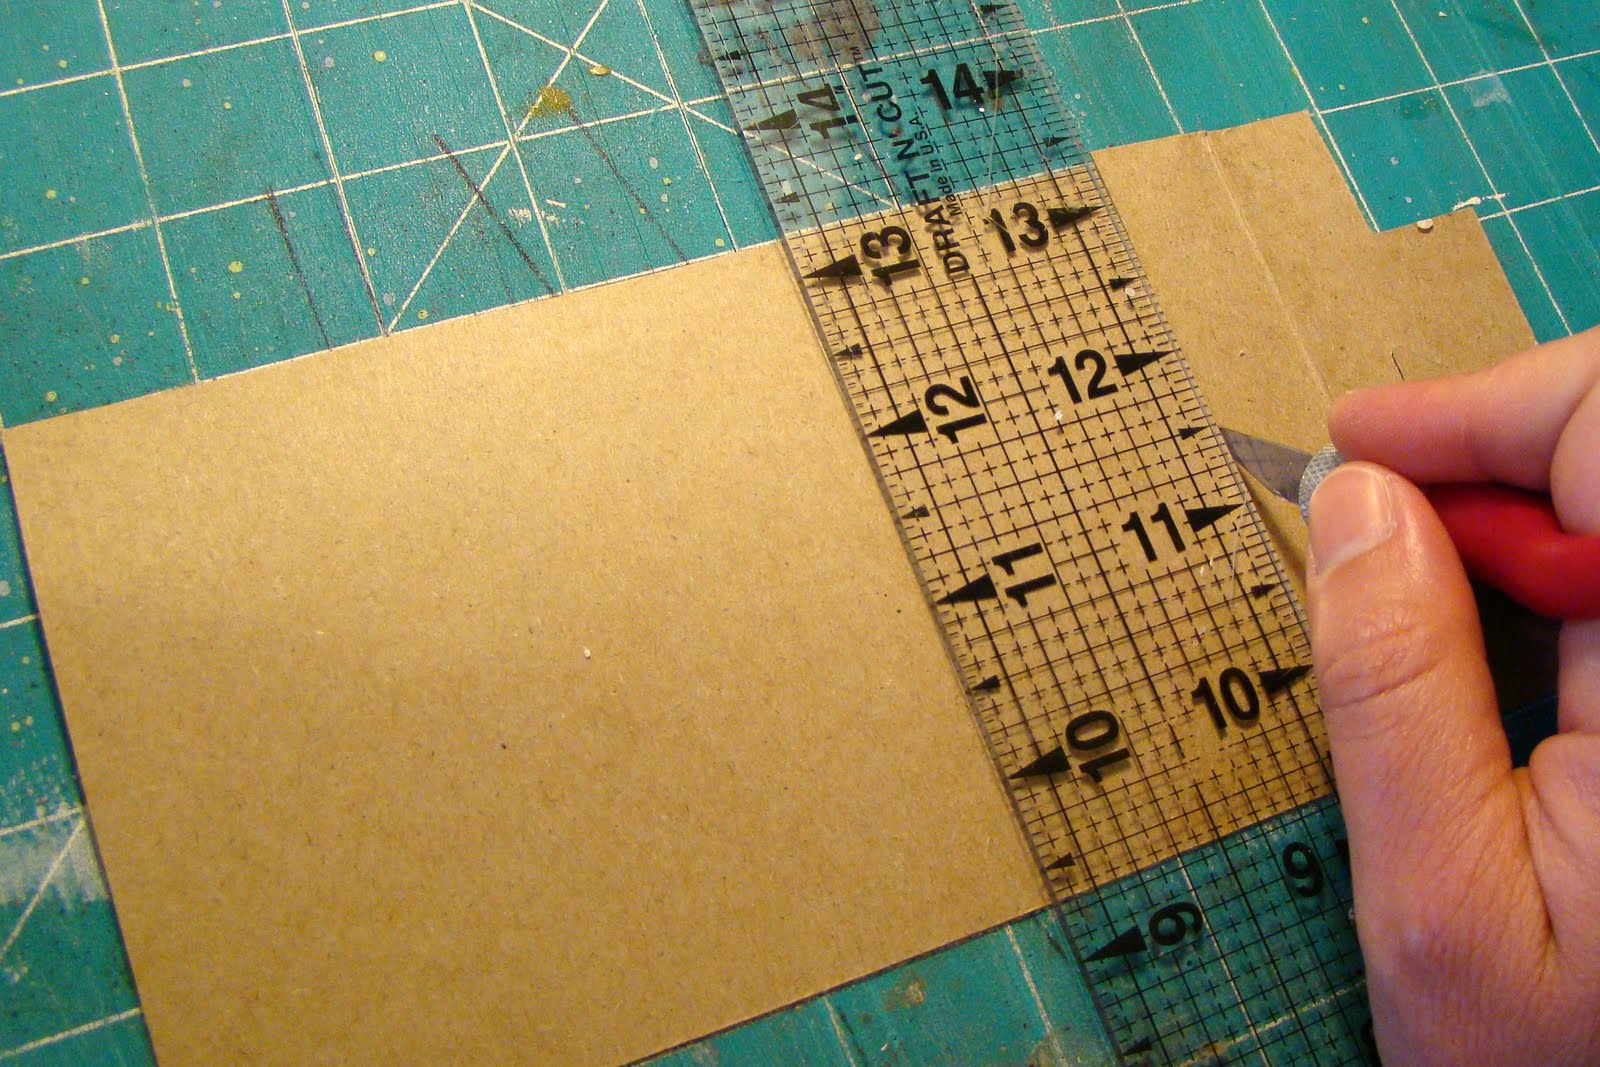
    First, use your ruler and hobby knife to cut a 4 1/4 x 6 1/4 inch rectangle for the cover. (All scrap materials from this project were recycled!)
    Using your cover piece as a guide, cut a piece from your sheet of Contact paper about 1/2 inch larger on all four sides.

    Gradually peel off paper backing from the Contact paper, applying the cardboard piece blank side down (to avoid having any print show through). Cut the corners as shown and fold over edges.

    Cut a 4x6 inch rectangle from your patterned scrap paper and adhere to the inside of your cover.

    Using your ruler and scoring tool, impress a line 3 inches in from each side of the 6 1/4 inch length. Fold on each score line and use your bone folder to create a clean fold. Don't press too hard during this step, or you may tear your paper!

    You should have a nice, crisp 1/4 inch binding like so:

    Next, cut your blank (or lined, or both) scrap papers to 4x6 inches. Stack together and fold in half, using your bone folder to make a sharp crease. You should be left with a 4x3 inch booklet (called a signature). Save one page (called a folio) to use as your signature-punching template.

    Making sure the pages are tightly together, use your ruler and hobby knife to trim the outside edge of your signature to eliminate the fore-edge creep.

    Using your ruler and the awl, mark your template on the crease, once in the middle (2 inches in from either side) and 1/2 inch from the top and bottom.

    Place the template inside your signature and using it as a guide, press the awl through all the pages, tapping with the hammer. When marking the cover, make sure your guide is in the middle of the binding, not aligned with the top or bottom. (I make a small mark with the awl, remove the template, then make the hole larger with the awl after assuring the hole will be in the middle of the binding, not close to one of my score lines.)


    Align your signature inside your cover. Cut the embroidery floss to an 18-inch length, then separate into 2 or 3 strands. Thread your needle with the strands and enter the middle hole from the inside, making sure to leave about a 4 inch tail.

    Enter through the top hole, then again go through the middle hole to the outside, keeping your thread snug.

    Enter through the bottom hole, then pass your needle underneath the binding stitch inside the book.

    Tie your loose ends in a double knot, then trim to about 1/4 inch.

    This is what the outside of your booklet will look like (I used dark thread so it would be easier to see for this tutorial, but you could use whatever color you like):

    The inside:

    You can affix a label or other decoration to the outside to personalize your notebook, and you've made your very own upcycled pocket journal! Congratulations, excellent work!

    Thanks for following along with my tutorial...and if you decide this project doesn't seem like something you'll have time for, I'm sure I'll have some available in my etsy store soon. Have a fabulous weekend!

    Wednesday, October 22, 2008

    Got Frozen Juice Lids?

    I've been saving the lids from frozen juice containers for awhile now, and just recently decided what to do with them..... and now I'm passing that on to you! I've been having a lot of fun making them.....Now here's my first blog tutorial: Juice Lid Mini Albums!

    Supplies: patterned paper for the inside and outside "cover"
    white cardstock for pages
    adhesive
    Crop-o-Dile
    2 5/16" circle punch
    2 frozen juice can lids
    book ring
    optional: spray paint, ink

    Step 1: Spray paint juice lids, if desired. I like to use Krylon Fusion since it requires no priming and seems to "stick" to almost anything.

    Step 2: Using your 2 5/16" circle punch, punch 2 circles from each of your patterned papers and about 10-12 circles from your white cardstock.

    Step 3: Ink the edges of your patterned paper, if desired, then adhere to both sides of each juice lid. HINT: The side with the raised edge will be the INSIDE of your album.

    I wanted the butterfly to be on the outside of my album, so I adhered it to the flatter side of the lid.

    Step 4: With the raised edge of the lid facing UP, use your Crop-o-Dile to punch a hole approx. 1/2" from the edge.

    Step 5: Using this first hole as a guide, line up the second album cover where you want it and mark where the hole will go. Punch with the Crop-o-Dile.

    Step 6: Do the same with your pages. Use the Crop-o-Dile again to punch through the entire page stack at once. You can use a binder clip to secure them together for punching, if you like.

    Step 7: Put your album together using the book ring! Easy peasy! And now you'll be a juice-lid-saving addict like me. :)

    I've been crafting this week to keep my mind off our very stressful financial situation....no more on that except to say that we got some good news today that takes away some of that stress! Which obviously puts me in the mood to blog, finally! Here's a card I made for The Art is Found blog. Their prompt this time is board games! Since our kids destroyed our CandyLand game, I made sure to salvage what I could and used one of the little men for this card. I just love those little candy men!

    I've been on a little bit of a card-making kick lately.....here are some more:


    Sorry for the bad scan on the last one...my scanner didn't like those buttons!

    Okay, must go and put some kids down for a nap, I think. If I sound distracted, it's because I can barely concentrate through all the arguing, wailing, and general freaking out that's going on around me right now! ::sigh::

    Hope you enjoyed my first blog tutorial and have a happy Wednesday!
    Related Posts with Thumbnails